Monday, January 28, 2019

Bennett Mountain


Lost Creek Wilderness
Overview
Bennett Mountain is in the Front Range of Colorado. This was my first ascent of Bennett Mountain, with the closest peak I have reported on being Carpenter Peak. I don’t assume too many people climb to the summit of Bennett Mountain, though the access road may get lots of trail runners, hunters, and snowshoe traffic. The trailhead is a little tricky to get to, so use the information provided below. This is a fairly short hike and getting to the trailhead may be more time consuming than the actual climb of the mountain. I hope you enjoy this trip report and find it helpful in planning your next adventure in the hills.

Directions/Trailhead Information
The Bennett Mountain Trailhead is located at—latitude 39.367832°, longitude -105.122883°. There is a small parking area that will accommodate a few vehicles. There are no restrooms at the trailhead. From the Denver area make your way to the small town of Sedalia. Sedalia is located at the intersection of US-85 N and CO-67 S. Follow CO-67 S for about 15.3 miles turning right on an unnamed road. Maybe a hundred feet prior to the turn there will be a roadside sign for the Columbine Public Archery Range. Turn right (north) following this road till it ends with a gate. The trailhead parking area is also used for the archery range. The side road from CO-67 S is a dirt road that is in good condition and is accessible for all vehicles.

The Climb
This is a short climb, at about 3.5 miles round trip that follows a closed off road for the majority of the hike. So basically, this isn’t an ideal climb in the 
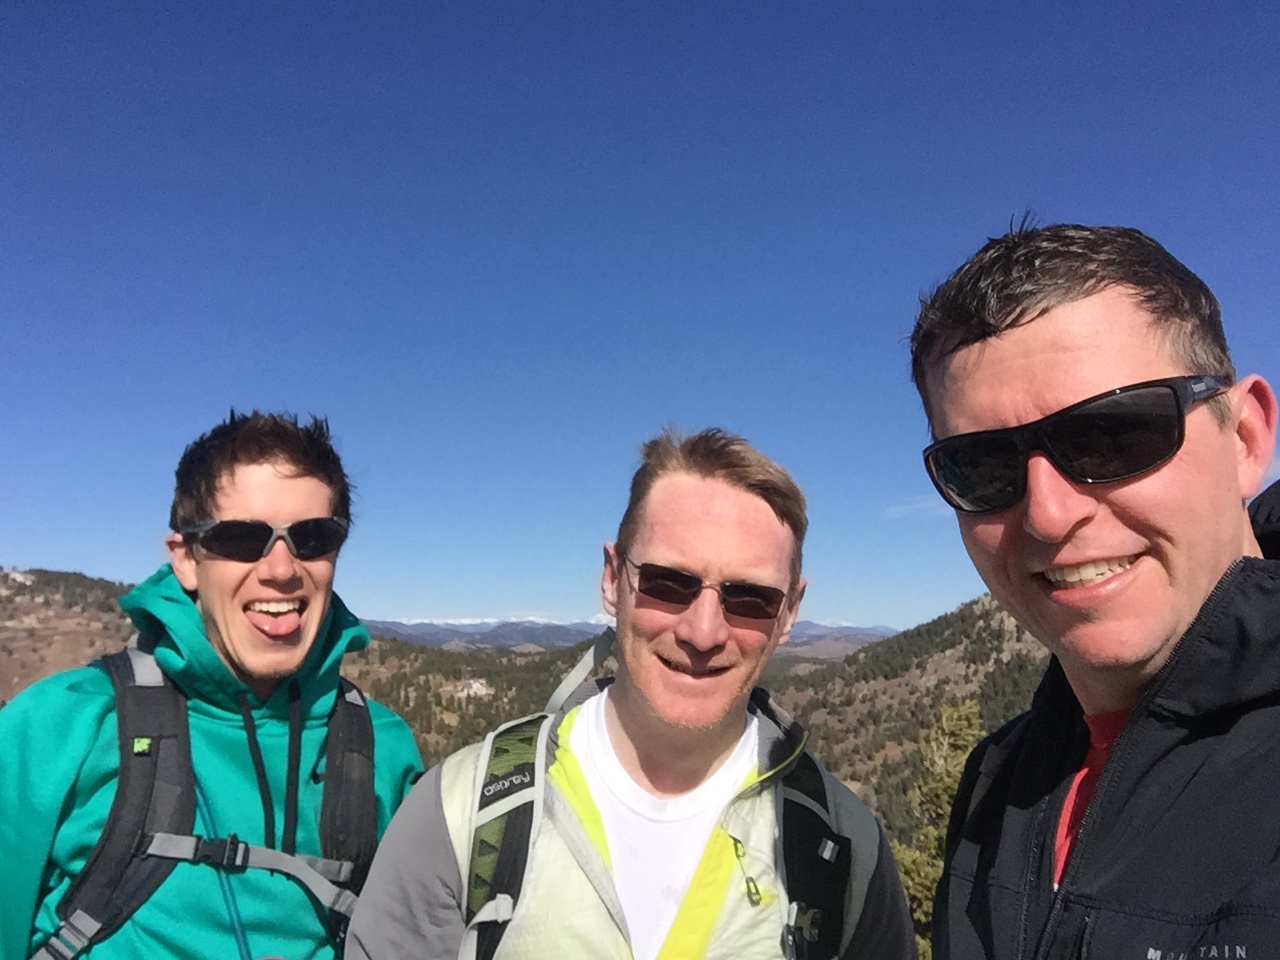
mountains for me, but my good friend Brian was in town and asked if we could get out on a mountain. From the trailhead there is a closed off road heading to the north. Follow this road till you get to the following coordinates: 39.383572° latitude, -105.128160° longitude. This is at a major bend in the road where the road starts trending to the northwest. An unofficial trail leading to the northwest can be spotted that will lead you to the summit of Bennett Mountain.
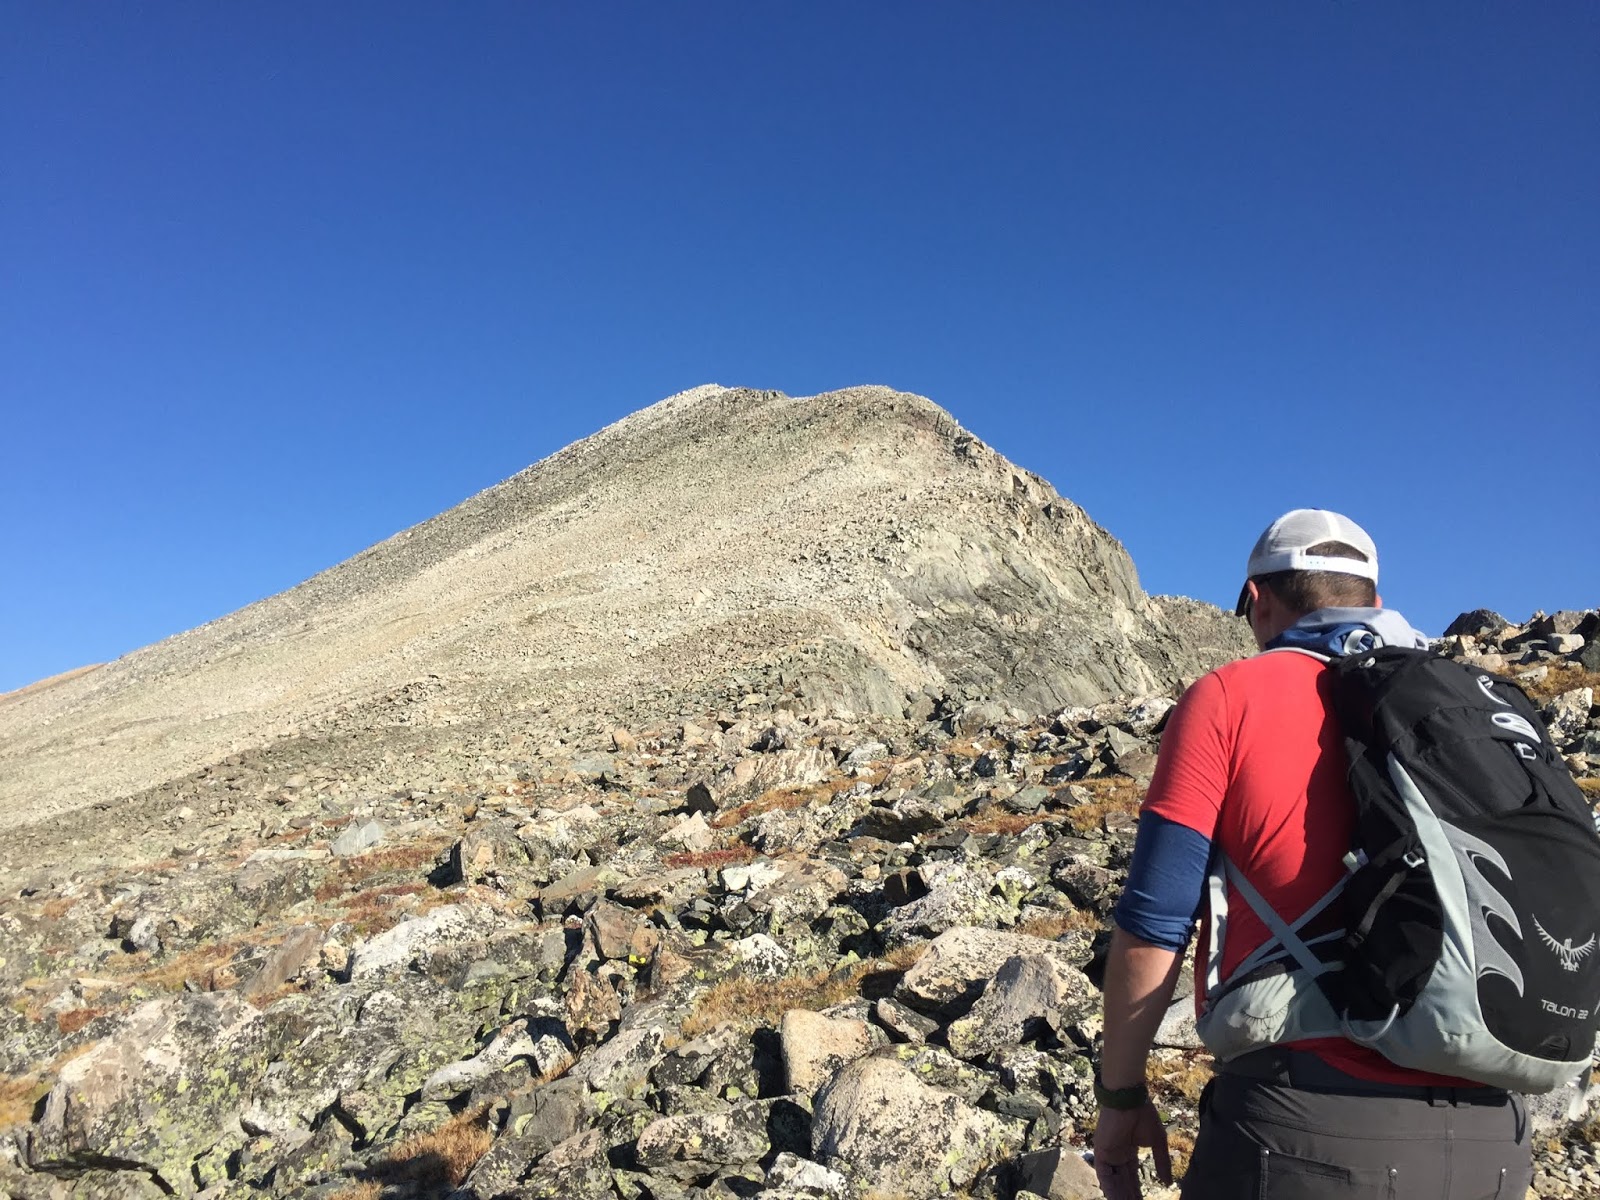
To be honest, this is a climb that will barely be enough to get your heart rate up, but there are some nice views of the Lost Creek Wilderness. After a frosty beverage at the summit we headed back on the same route we took to the summit.

Parting Notes
A nice short hike, that would be a good intro or starter hike for the season. This would be a nice family place if you would like your kids to run around a bit. I’ll bring my family back here in the summer months for a family outing. Until next time, cheers!

GPS Track
Date: October 23, 2016
Trailhead Elevation: 7,646 feet
Bennett Mountain: 8,022 feet
Total Ascent: 430 feet
Class: 2
Distance: 3.5 miles
Moving Time: 1 hr 8 min
Stopped Time: 0 hr 24 min
Climbing Partners: Brian

Goat Mountain


Goat Mountain
Overview
Goat Mountain is in the Front Range of Colorado. This was my first ascent of Goat Mountain, with other climbs in the area being Carpenter Peak, Bill Couch Mountain, Plymouth Mountain, and Deer Creek Canyon Park. This area is fairly popular with the trailhead location being just south of the Denver area, allowing all vehicles access. I would guess that Goat Mountain receives few climbers with the majority of outdoor enthusiasts keeping to the Waterton Canyon Trail. This area is accessible in all seasons. The climb of this summit offers great foothills views with a chance to see some big horn sheep. I hope you enjoy this trip report and find it helpful in planning your next adventure in the hills.

Directions/Trailhead Information
The Waterton Canyon Trailhead is located at—latitude 39.491238°, longitude -105.093659°. There is a large parking area that will accommodate about 100 vehicles. There are restrooms at the trailhead. From the Denver area make your way to the intersection of CO-470 W and CO-121 S/S Wadsworth Blvd in Columbine. Take the CO-121 S exit heading south, follow CO-121 S for about 10 miles to Waterton Rd. Turn left (southeast) on Waterton Rd and follow for about 4.7 miles to the trailhead. The trailhead will be on the left (east) side of the road. The road is paved all the way to the trailhead making this accessible for all vehicles.

The Climb
The climb of Goat Mountain is pretty straightforward. There is an unofficial trail that leads to the summit from the trailhead. From the trailhead follow the Waterton Canyon Trail across Waterton Rd. This will resemble more of a road than a trail at this point. Follow the Waterton Canyon Trail for approximately 1.2 miles to the coordinates: 39.483907° latitude, -105.112163° longitude. At this location there are some overhead pipes going over the main trail, you will need to find a trail splitting off to the right of the main trail heading north up through some rocks and vegetation. Once on this trail you will follow it all the way to the summit.
Will, Cole, and Nick on the summit of Goat Mountain

There is an initial climb to get you onto the eastern ridge, then the trail mellows into a more gradual climb. The trail is easily identifiable and would be a good place to trail run, hike or snowshoe. I was trying out some new trail runners for this climb, and they were a better option than hiking boots I my opinion. The trail passes through a few different types of environments, from dense almost willow like trees, open ridge, and exposed rock. At just over 3.5 miles to the summit, you get a good climb in for being a foothills mountain. Don’t expect it to be as easy as its neighbors to the north in the Deer Creek Canyon Park. The summit is rock capped and offers great views of the southern Denver metro area. This is a yo-yo route, so just follow the trail back down to the trailhead.

Parting Notes
This is a good training hike that is close to town. I will most likely come back to its summit again in the future. The Waterton Canyon Trailhead is very busy, but once you are off the main trail you might only see a handful of people along the trail that leads to the summit. Until next time, cheers!

GPS Track
Date: March 4, 2017
Trailhead Elevation: 5,497 feet
Goat Mountain: 7,785 feet
Total Ascent: 2,270 feet
Class: 2
Distance: 7.4 miles
Moving Time: 2 hr 52 min
Stopped Time: 1 hr 24 min
Climbing Partners: Cole, Will

Sunday, January 27, 2019

Mount Parnassus-Woods Mountain-Mount Machebeuf


Bard Mountain and Mount Parnassus from Woods Mountain
Overview
Mount Parnassus, Woods Mountain, and Mount Machebeuf are in the Front Range of Colorado. In the past I have climbed each of these peaks by themselves but never together; here are the links to past trip reports—Mount Parnassus, Woods Mountain, and Mount Machebeuf. This area is fairly popular with the trailhead location being near the interstate, allowing all vehicles access. I would guess that Mount Parnassus receives the bulk of the traffic for these mountains, though Herman Lake is also accessible from the same trailhead. This area is accessible in all seasons, but there may be avalanche danger crossing the west face of Parnassus in the winter. The climb to these summits offers great forest and alpine views, and is a great option for a hike not too far from the city.  I hope you enjoy this trip report and find it helpful in planning your next adventure in the hills.

Directions/Trailhead Information
The Herman Gulch Trailhead is located at—latitude 39.702497°, longitude -105.854293°. There is a large parking area that will accommodate about 100 vehicles. There are restrooms at the trailhead. From the Denver area make your way to exit 218 at the intersections of I-70 W and Watrous Way. Take a right-hand turn (east), and follow Watrous Way about 0.2 miles to the trailhead. Watrous Way is a dirt road that is assessable to all vehicles.

The Climb
Nick and Cole on the summit of Mount Parnassus
The area accessed from the Herman Gulch Trailhead has two main options— (1) Herman Gulch and (2) Watrous Gulch. Herman Gulch is accessed from the Herman Gulch Trail that is about 3 miles in length to Herman Lake. This is where the majority of the outdoor enthusiasts are headed from the trailhead. Watrous Gulch offers more of a choose your own adventure. From the trailhead you start off on the Herman Gulch Trailhead, and in about 300 meters the Herman Gulch Trail takes a switchback heading to the northwest and the Bard Mountain Trail continues to the north east. If you look at the GPS Track information I have provided, where there is a picture of Cole crossing a creek. From that point the official Bard Mountain Trail continues southeast around Mount Parnassus, this is the point you will break off of this trail. I don’t think there is an official trail so to say, but there is a solid trail following the Watrous Gulch to near the 11,800-foot contour that heads north. From there the trails peter out and you are on your own as you choose your own adventure.

I have done the climb of Parnassus a few times. Anyone is decent shape can make the summit in 2-3 hours from the trailhead. I would say anyone looking to do a sunrise climb, that Parnassus would fit the bill nicely for that. From the summit of Parnassus, you can continue east to Bard Mountain, or head west back down to the Parnassus-Woods saddle. There are so many options available here, and that’s what makes this area an outdoor playground for us adults. We had our route mapped out prior to the climb, so after a bit on the summit of Parnassus we headed back down to the Parnassus-Woods saddle and continued up Woods Mountain.

Cole the conquer on the summit of Mount Machebeuf
After climbing Parnassus, the hike up Woods Mountain is a breeze. I’m not sure the exact elevation gain from the saddle, but it can’t be much more than 400 feet. It feels like it takes minutes, so if you are just in for a short day the Parnassus-Woods climb is a great option. From the summit of Woods Mountain, we headed southwest following the ridge to Mount Machebeuf.

This is a gradual rolling hill of a ridge, and the ridge will hold snow into the summer months. Once making the summit of Machebeuf you have options to follow our track down to the southeast or follow the ridgeline to the west. When I previously summited Machebeuf I came from the west and would probably recommend that rather than the route we took back to the trailhead. Our route down became quite the bushwhack and hurdle over many trees on steep terrain till intersecting the Bard Mountain Trail. It wasn’t the worst bushwhack down a mountain I’ve ever been on, but I can’t say I’d recommend it.

Parting Notes
I love being able to loop multiple mountains together. This area is a gem, with so many options that you can keep coming into the same area and not do the same trip each time. I have got to the point where I have climbed almost all the peaks in this area, but I will continue to keep coming back. I’m always surprised that I don’t run into a lot of people up Watrous Gulch, even with a parking lot full of cars. So, I would recommend avoiding the Herman Lake hike and wonder up one of these high mountain peaks away from the crowds on your next trip into the hills. Until next time, cheers!

GPS Track
Date: June 24, 2017
Trailhead Elevation: 10,317 feet
Mount Parnassus: 13,579 feet
Woods Mountain: 11,703 feet
Mount Machebeuf: 12,251 feet
Class: 2
Distance: 8.1 miles
Moving Time: 4 hr 29 min
Stopped Time: 0 hr 42 min
Climbing Partner: Cole

Fletcher Mountain

Nick and the pyramid of Fletcher Mountain (C.Archer photo)

Overview
Fletcher Mountain is in the Tenmile Range of Colorado. In the past I have climbed the nearby peaks—Quandary Peak, Pacific and Atlantic Peaks, and Drift Peak; this will be my first ascent of Fletcher Mountain. I imagine this is a fairly popular climb due to its location near Breckenridge as well as it being short in mileage. This area is accessible in all seasons, but this would be a tough climb in the winter months, where avalanche danger may pose a considerable risk. The website 14ers.com has a route page describing the Fletcher and Drift Mountain Traverse that can be used as an additional information source in your planning of this climb. The climb to the summit is all above tree line, offering great alpine views with possible mountain goat sightings.  I hope you enjoy this trip report and find it helpful in planning your next adventure in the hills.

Directions/Trailhead Information
Draw heading into rock glacier country (C.Archer photo)
The Blue Lakes Trailhead is located at—latitude 39.386688°, longitude -106.100326°. There is a small parking area that will accommodate about 30 vehicles at the end of the road. There are no restrooms at the trailhead. There are two options to approach the trailhead from the Denver area—US Hwy 285 S and I-70 W, these directions will approach from I-70 W. From the Denver area make your way to exit 203 at the intersections of I-70 W and CO-9 S. Follow CO-9 S for approximately 18 miles to Blue Lakes Rd. Turn right (west) and follow Blue Lakes Rd for approximately 2.2 miles to the Blue Lakes Trailhead. Blue Lakes Rd is a rough dirt road, but does not require 4WD. I would say this trailhead is accessible to all vehicles.

Nick making his way through the rocks (C.Archer photo)
The Climb
The ascent of Fletcher starts from the Blue Lakes Trailhead. There are a few random trails that make their way around the reservoir so it may be a little tricky making sure you are on the correct path. None of these are official trails, therefore they are not maintained. They are kept up by foot traffic from everyday climbers such as ourselves. From the Northern point of the dam a trail will start, within a few hundred feet there will be a split, take the higher trail and avoid following the low trail around the waters edge. This trail will start to cut across the southern flanks of Quandary Peak. After crossing the initial rock glacier that feeds all the way into the reservoir, the trail will start heading up a draw between Fletcher Mountain and Quandary Peak.

Southern view from Fletcher Mountain (C. Archer photo)
There is a cut-in creek drainage that parallels the edge of the southwest rock glaciers from Quandary Peak, the trail mirrors the creek as you start gaining elevation. Eventually the rock glaciers from the west and east merge and from there you will lose the creek for the majority of the remainder of the climb. As you continue to make your way up the route, the path makes a northwest bearing rather than heading directly the to the saddle separating Fletcher and Quandary. Once you gain the alpine tundra plateau out of the cirque there is a short walk to the base of the Fletcher pyramid. As you make your way to the pyramid, stick to the southeast ridge and follow that directly to the summit.
View north from Fletcher Mountain (C.Archer photo)

Some adventurous people will attempt to combine Drift Peak with Fletcher as we attempted. We did not succeed in combining the two. I was a little uncomfortable with the last push up Drift. I will not give any advice to this route as I cannot guarantee we were on the best line to ascend the summit of Drift. You can see the route we were on by looking at the GPS Track below. If you are just out to climb Fletcher, I would descend the same line you used for the ascent.

Parting Notes
The data below reflects the attempt of adding Drift Peak with Fletcher Mountain. We did not complete this addition, but came very close to doing so. Keep this in mind as the time, distance, and elevation gain will not accurately reflect data for only climbing Fletcher Mountain. This was a great climb that travels through some beautiful alpine tundra, as well as beautiful geologic structures. Some day I will probably come back to complete the traverse from Fletcher to Drift, though it is not on my list of climbs to complete anytime soon. Until next time, cheers!

GPS Track
Date: September 3, 2017
Trailhead Elevation: 11,707 feet
Fletcher Mountain: 13,907 feet
Total Elevation Gain: 2,277 feet
Class: 2
Distance: 5.4 miles
Moving Time: 4 hr 41 min
Stopped Time: 2 hr 26 min
Climbing Partner: Cole

Sunday, January 20, 2019

Mount Logan


Mountain lake on route to Mount Logan
 Overview
Mount Logan is a mountain in the Front Range of Colorado. In the past I have climbed the nearby peaks—Pegmatite Points, Pegmatite Points Round Two, Rosalie Peak, Pegmatite Points, though this will be my first ascent of Mount Logan. I don’t think this is a popular summit, so if your looking for a good bushwhack and some solitude this summit may be for you. This area is accessible in all seasons, but this would be a tough climb in the winter months, I would suggest doing it in the dry season. The climb to the summit will offer great forest, and alpine views with possible mountain goat sightings.  I hope you enjoy this trip report and find it helpful in planning your next adventure in the hills.

Directions/Trailhead Information
The forest
The Deer Creek Trailhead is located at—latitude 39.510571°, longitude -105.567551°. There is a small parking area that will accommodate about 30 vehicles at the end of the road. There are no restrooms at the trailhead. From the Denver area make your way to the intersection of CO-470 W and US Hwy 285 S. Follow US Hwy 285 S for approximately 43 miles to CO Rd 43A. Turn right (north) and follow CO Rd 43A as it merges into Deer Creek Rd (CO Rd 43). Follow Deer Creek Rd for approximately 8.8 miles to the end of the road. There will be a slight jog to the left on CO Rd 43, this will eventually turn to a dirt road and you will pass Deer Creek Campground. The road gets a little rough past the campground to the trailhead, but I see low clearance vehicles in the lot often so I would say this trailhead is accessible to all vehicles.

The Climb
For years I have thought of climbing Mount Logan, but like most other climbers, there are bigger fish to fry so to say, so I end up climbing another peak. There isn’t a lot of trip reports that I could find for this climb, so that lets me know not too many people make the trek up to the summit. The route I chose approached from the east from the Deer Creek Trailhead, a place I’m very familiar with. About a year earlier Cole and I made an attempt in the winter and turned back due to the maze of downfall. With this attempt in the summer I increased my odds of making it to the summit.

View though the clouds
From the trailhead there is a single trail that eventually splits off to a few others within the Mount Evans Wilderness area. Rosalie Trail starts from the trailhead, and after about 100 meters the trail splits with Rosalie Trail going to the left and Tanglewood Trail going to the right, stay on the Rosalie Trail. The trail is more of a road at this point. After another 400 meters or so there will be an old road splitting off to the left up a draw, follow this. I’m not sure on the mileage of when this road “ends” or kind of peters out, but on my GPS Track below where the track splits that is the end of the old road. If you follow the southern track that is on an old trail of sorts I found on my descent, where the norther track was cross country version from my ascent.

From here to tree line it’s a bit of bushwhack. There are remnants of trails here and there, but you will spend a lot of time navigating over downfall and around some marsh type areas. Make your way to the shoulder to the south of the couloir, which will be pretty evident as you climb. After gaining tree line the mountain opens up, and near the summit it seems like a flat area that could host many football fields.

Mount Logan summit
My feet were killing me, I had bought some new boots and was giving them a trial run and they clearly weren’t working out. With sore feet, I wanted to get off the mountain so I could ditch the boots for my sandals. I took a few minutes on the summit before descending my route of ascent. I noticed a large group of mountain goats on a far-off ridge to the north as I started down the mountain. They were too far away to get a good picture with my phone, but it was nice to know I wasn’t totally alone out there.

I stayed pretty true to my ascent route going down, other than finding a trail that loops to the south of the old road I hiked up early in the climb. My boots were rubbing on my ankles, so each step was awful pain. I just decided to cowboy up and get out of there. After a bit of torture, I made it back to the car and the boots made it back into the box ready for a return to REI.

Parting Notes
Because of my boot situation this climb wasn’t too enjoyable. Taking that out of the equation this is still a taxing route with all of the bushwhacking that was involved. I had thought about ascending from the north, and if I choose to come back to this peak again that will probably be the plan. Until next time, cheers!

GPS Track
Date: July 15, 2018
Trailhead Elevation: 9,285 feet
Mount Logan: 12,867 feet
Total Elevation Gain: 3,583 feet
Class: 2
Distance: 9.3 miles
Moving Time: 6 hr 6 min
Stopped Time: 0 hr 40 min
Climbing Partner: Solo
GAIA GPS Link: Mount Logan (2018-07-15)

Saturday, January 19, 2019

Drift Peak


Drift Peak
Overview
Drift Peak is part of the Tenmile Range in Colorado. This is a less prominent peak in comparison to its neighbors of Fletcher Mountain, Atlantic Peak and Quandary Peak. I would assume Drift would see far less visitors to its summit, compared to its neighbors, making this a desirable climb for myself. With this peak having a lower and upper trailhead, it opens this climb into an all-season mountain. Where in the winter months ascents would begin from the lower trailhead and dry season attempts would begin from the upper trailhead. Previously Cole and I attempted Drift from the east during our climb of Fletcher Peak. The route from that direction is more intense with a class 3 rating. We chose to attempt it from the west which we felt more comfortable with. This is a beautiful area, that gets a fair amount of activity. Near the trailhead are some historic mine buildings you can explore if you don’t desire the summit. The basin offers amazing views of the high peaks and is worth the hike in if you are up for it. I hope you enjoy this trip report and find it helpful in planning your next adventure in the hills.

Directions/Trailhead Information
Cole on the ridge
The upper Drift Peak Trailhead, also known as Mayflower Gulch is located at—latitude 39.414153°, longitude -106.148485°. There is a small parking area for about 6 vehicles at the end of the road. Alternative parking is at the lower Drift Peak Trailhead, on a roadside pullout on the south side of CO-91 S that will accommodate approximately 50 vehicles. The distance from the lower to upper trailheads is approximately 1.5 miles. The lower trailhead is where low clearance vehicles should park, and higher clearance vehicles can proceed to the upper trailhead. The use of 4WD is dependent on the time of year, when we drove the road, 4WD in my Chevy Blazer was not required. There are no restrooms at either parking area. From the Denver area make your way along I-70 W to exit 195 onto CO-91 S. Head south following CO-91 S for about 6 miles to the lower Drift Peak Trailhead, continue 1.5 miles on the rough dirt road to the upper Drift Peak Trailhead.

The Climb
Some people aspire to knock off all of the Colorado 14ers, but for me I’d rather focus my time in a range that I truly love, and explore as much as it has to offer. This has been my obsession with the Tenmile Range for years now, where each year I summit a few of its high mountain peaks. Drift Peak is part of this journey for me, this trip report will describe our climb from the west. This area is also known as Mayflower Gulch, but I will refer to it as the Drift Peak Trailhead.

Climber route on the ridge
The upper Drift Peak Trailhead is in the area of the historic Boston Mine. A closed off road will start ascending to the south and that is the start of the climb. This road will switchback a few times before connecting to the west-northwest ridge of Drift Peak. Once on the ridge there is a climber’s trail that you can follow. Sometimes its pretty faint, but for the most part it’s a clear trail that will lead you all the way to the summit.

This is a route that is short in mileage, but makes up for it with elevation gain. I knew I wouldn’t be in great shape for this one, but it clearly kicked my ass. A day later I was down with the flu so I will blame my poor performance on this climb to being sick. My younger brother Nate was with us, a fresh Colorado transplant from Connecticut, and he had no problem kicking my butt to the summit.

The ridge was a lot of fun, providing great views to fend off the suffering in my mind. After what seemed like an eternity, we made the summit. We all had a few summit beers as we took in the amazing views. I assume this summit sees its fare share of visitors due to the shortness of the climb, but not nearly as many as the surrounding peaks like Quandary.

Nick, Cole, and Nate on the summit of Drift Peak
Instead of making this a yo-yo route back to the trailhead, we took a route down into the basin which you can see on the GPS Track picture below. The upper portion was a solid climbers/miners trail and it slowly degraded as we lost elevation. After dropping to about 12,500 feet the valley opened up a bit and we could follow a solid trail again. There was a lot of evidence of mining back here, where there were some large craters which I suppose were blown out with a little dynamite and some back breaking work of the hearty miners. As we continued down the valley, we eventually met up with the old road we used on our ascent. From there is was less than a quarter mile back to the trailhead. This was a nice loop way to do this route, though I assume people yo-yo the ridge.

Parting Notes
I really enjoyed climbing this peak from the western side. This was the first Tenmile Range summit I have climbed from the west. I would still rank the Pacific/Atlantic Peaks as my favorite in the range, but this was a great smaller climb that most people could accomplish in half a day. I think this area gets a lot of activity, so if you plan to drive to the upper trailhead in the summer months, I wouldn’t be shocked if you had trouble parking, so keep that in mind when you make your trip plans. Until next time, cheers!

GPS Track
Date: August 17, 2018
Trailhead Elevation: 11,521 feet
Drift Peak: 13,802 feet
Total Elevation Gain: 2,326 feet
Class: 2
Distance: 3.6 miles
Moving Time: 3 hr 43 min
Stopped Time: 2 hr 11 min
Climbing Partner: Nate and Cole

GAIA GPS Link: Drift Peak (2018-08-17)

Friday, January 18, 2019

Mount Flora and Colorado Mines Peak


View looking towards Winter Park
Overview
Mount Flora and Colorado Mines Peak are great for all-season hiking, trail running, winter snowshoeing, and skiing. I have been to these mountains several times before; these trip reports may provide additional information not included in this report—Colorado Mines Peak, Mount Flora, Mount Flora; and nearby peaks—Witter, Eva, Parry, and Bancroft Loop. This is a place I enjoy hiking as you are in an alpine environment practically from the trailhead and the view of the surrounding peaks are endless. Eventually I would like to complete a traverse from Colorado Mines Peak to James Peak, so hopefully a trip report for that will surface this year. I hope you enjoy this trip report and find it helpful in planning your next adventure in the hills.

Directions/Trailhead Information
The Mount Flora and Colorado Mines Peak begins at the Berthoud Pass Trailhead, located at—latitude 39.797783°, longitude -105.776713°. There is a large parking lot on the east side US-40 W. This parking area will accommodate approximately 100 vehicles. There is a restroom and a warming hut at this trailhead. From the Denver area make your way along I-70 W to exit 232 onto US-40 W. Head north following US-40 W for about 19 miles to the Berthoud Pass Trailhead.

The Climb
This climb took place on Columbus Day, so with Chris and I having the day off we decided to get out on a nearby hike. Today’s objective was to ascend Mount Flora, Colorado Mines Peak and Breckenridge Peak. I have previously climbed Flora and Colorado Mines Peak, but have yet been able to add on Breckenridge. Unfortunately, that still holds true. We had miserable weather and were not able to make the extension over to Breckenridge Peak, but were able to ascend Flora and Colorado Mines Peak. The weather was so cold my phone shut down, so the GPX file is not complete or any of the data provided within my general statistics section below. I have added an asterisk (*) to indicate the data that are not complete for the trip.

Nick and Chris on the summit of Mount Flora
It was a cold, blustery day. We got geared up as quickly as we could and were soon heading up the trail. From the trailhead the Continental Divide Trail starts up an access road that continues to the summit of Colorado Mines Peak where there are some large buildings of which I do not know the purpose. At one point the west face of the mountain was an active ski hill, so this is quite popular for skiers and winter outdoor enthusiasts. As you are hiking up the road you will see a trail sign at the start of the fourth switchback, indicating the mileage to Mount Flora. I don’t recall the mileage on the sign to Mount Flora, but I believe it’s 2 miles from that location. Now that you are on an actual trail, it feels a bit more like the outdoor experience you were hoping for. The trail wraps around the northwest face of Colorado Mines Peak ascending to the saddle that separated Mount Flora and Colorado Mines Peaks.

View near the saddle
Once we hit the saddle the wind really kicked into high gear and it felt like we were in a wind tunnel. The rocks were mostly covered in snow, but the trail was still visible. We attempted to cover all areas of exposed skin, but you can never really cover everything. The conditions make it a challenge, which even though they seem to suck at times, I still enjoy it. We had to use the GPS to make sure we made it to the summit of Mount Flora. You could barely make out the towering rock cairns in the white-out, but we were able to determine the high point with our trusty electronic devices. I joke about this because my phone shut down due to the frigid temps. So always know where your going and have a backup such as a hard copy of a map when your heading out in conditions such as we did. We spent about 30 seconds on the summit and decided it was an extremely bad idea to try and climb out to Breckenridge Peak, so we started backtracking our route.

Once we made it back to the saddle separating the peaks, we decided to head up Colorado Mines Peak rather than following our tracks back to the trailhead. The weather was starting to calm down a bit, but it was still frigid. A couple hundred vertical feet will get you to the top of Colorado Mines Peak. We found a building to shelter behind long enough to get some calories and water in. From there we followed the road back down to the trailhead.

Parting Notes
This is a great place to hike, though I’m not sure I have ever been up there in good conditions. In the summer I really would like to connect all the peaks on this ridge in about a 12-mile day, ending with the summit of James Peak. Hopefully that happens, but if not I’m sure I’ll be back to hike these two peaks again with my family. The trail is nice and gradual and it would be a good place to let my toddler run around when the weather is much friendlier. Until next time, cheers!

GPS Track
Date: October 8, 2018
Trailhead Elevation: 11,327 feet
Mount Flora: 13,127 feet
Colorado Mines Peak: 12,392 feet
Total Elevation Gain: 1,681* feet
Class: 2
Distance: 3.1* miles
Moving Time: 1* hr 48 min
Stopped Time: 0* hr 5 min
Climbing Partner: Chris

GAIA GPS Link: Mount Flora (2018-10-08)

Thursday, January 17, 2019

Galena Peak

Galena Peak
Overview
Galena Peak is located in the Boulder Mountains of Idaho. I have only climbed a few peaks in the range, but each of them presents their own challenges to overcome. The trailhead for Galena is close to the Galena Lodge area where there are many trails used for mountain biking and cross-country skiing. The route up Galena is on an unofficial climber’s trail that offers both forested and alpine views. I hope you enjoy this trip report and find it helpful in planning your next adventure in the hills.

Directions/Trailhead Information
The Galena Peak Trailhead is located at—latitude 43.880398°, longitude -114.634628°. There are a few small pullouts along the road, but there is no official trailhead parking. From Ketchum drive north on State Hwy 75 N for about 23 miles to Forest Rd 409. Make a right-hand turn traveling northeast on Forest Rd 409, and follow this for about 1.5 miles. The road was in good shape in October, I had a Nissan Rogue rental that made the drive without any issues. The coordinates provided are for the location where we parked, there is additional parking further up the road. There is a faint climbers trail heading to the northeast from the end of the road, this is considered the start of the trailhead for the climb.

The Climb
Today’s objective was to ascend Galena Peak, getting out on my second Idaho summit in a week, this time with my old climbing buddy LT. We met up in Hailey the night before, and made our way out to the trailhead for an early morning ascent the following day. LT brought his dogs to join us on the climb. Today's climb would not be on an official trail, we would follow the west-southwest ridge to the summit.  

LT on the ridge
From the trailhead we weren’t on the climber’s trail till we gained the first 100 feet, by then LT’s dogs bolted up the valley to the north. As he tried to reign them in, I kept going at a slow pace waiting for him to rejoin me. After continuing for about 15 minutes and not hearing from LT or the dogs I descended back to the trail. I started hiking up the valley in the direction I last saw the dogs. After a few minutes I turned around, checked by the vehicles and there was no sign of anyone. I decided to continue up the mountain in hopes that our paths would eventually cross.

I was hiking at a pretty slow pace through the trees as I was trying to listen for any sign of LT and the dogs. As I was about to break tree line, I finally saw some prints in the snow that were theirs. After that I increased my pace knowing they were ahead of me. I finally saw LT about a quarter mile or so ahead of me on the ridge line, so as he took a break, I finally caught up with them. There was a solid climbers trail above tree line to follow, but in the trees that was harder to keep to, especially with the intermittent snow cover. I would imagine in the dry season the route is pretty straight forward to follow.
Nick, LT, and the dogs on the summit of Galena Peak

After catching up to LT we were on a mix of rock and snow for the remainder of the climb. This climb was taxing me much more than the climb earlier in the week. The final push to the summit gave us amazing views of all the surrounding peaks. Once on the summit we had a beer and some snacks before making our way back down the mountain.


This was a yo-yo route, so after departing the summit we followed the route of ascent back to the trailhead. Even with spending a good deal of time on the summit, the total trip time was six and a half hours. I was pretty happy with that considering the dog fiasco that started the day. It was a good climb, and I was glad to get on a summit with LT again. By the end of the day I was pretty exhausted and was eager to eat LT’s chips and salsa and drink his beer.

Parting Notes
This is a great climb, one which I highly recommend. This is relatively short in miles, but it makes up for it in elevation gain. The views of the surrounding peaks are worth coming back to this one, should the option ever present itself. I would love to climb some more peaks in the Boulders, but those trips to Idaho from Colorado are few and far between these days. Until next time, cheers!

GPS Track
Date: October 20, 2018
Trailhead Elevation: 7,764 feet
Galen Peak: 11,112 feet
Total Elevation Gain: 3,698 feet
Class: 2
Distance: 5.0 miles
Moving Time: 4 hr 49 min
Stopped Time: 1 hr 40 min
Climbing Partner: LT

GAIA GPS Link: Galena Peak (2018-10-20)

Norton Peak

Norton Peak

Overview
Norton Peak is located in the Smoky Mountains of Idaho. Although I lived in Idaho for many years, this was my first time to the mountain. This area has a few trails, that through a little effort and sweat will offer you beautiful forest, lake, and alpine views. I hope you enjoy this trip report and find it helpful in planning your next adventure in the hills.

Directions/Trailhead Information
The Norton Peak Trailhead is located at—latitude 43.731049°, longitude -114.633296°. There is a small parking lot that will hold about a dozen vehicles with additional places to pull out alongside the road. There are no restrooms at this trailhead. From Ketchum drive north on State Hwy 75 N for about 15 miles to Baker Creek Rd. Make a left-hand turn traveling west on Baker Creek Rd, and follow this for about 6 miles. Turn right to the northwest onto Forest Rd 170, and follow this for 1.3 miles to the trailhead. The road was in good shape in October, I had a Nissan Rogue rental that made the drive without any issues. There are two trails that lead out of this trailhead: (1) Norton Lakes Tail, (2) West Fork Norton Trail. This trip report follows the Norton Lakes Trail.

The Climb
Norton Peak summit
Today’s objective was to ascend Norton Peak, getting out on my first Idaho summit in what feels like years. There are many trip reports that entail descriptions of climbs of Norton Peak, I have left a few links in the Parting Notes section below should you need to do some further research. For today’s climb my plan was to approach the peak from the south via the Norton Lakes Trail.  

The start of the climb begins by crossing a wooden bridge, then take the trail to the right heading north. This isn’t marked very clearly, so make sure you are gaining considerable elevation rather than traversing across the western slope of the West Fork Norton Trail. On the GAIA map the only trail that appears is the Norton Lakes Trail and is not labeled with a formal name. I followed this trail through a forested valley passing two small mountain lakes—Norton Lakes. After the lakes the trail switchbacks several times making its way over the southwest ridge of Norton Peak. From this point I believe I was following a climber’s trail to the summit and was off the Norton Lakes Trail. The ridge leading to the summit was rocky and at points narrow, providing a nice ending to the summit. The views from the summit are unmatched, a complete 360° postcard worthy view of the surrounding peaks.
Norton Lakes

This was a yo-yo route, so after departing the summit I followed the route of ascent back to the trailhead. Even with spending a good deal of time on the summit, the total trip time was just over four hours. I was happy with my performance today, as its been quite a while since I was out on an isolated peak.

Parting Notes
Nick on the summit of Norton Peak
This is a great climb, one which I highly recommend. Even if you only wish to visit the Norton Lakes the views are worth the effort it will take to get to the destination. This was a warm-up hike for a climb of Galena Peak later in the week. I’m feeling pretty good going into that climb which I should have a trip report for very shortly. Whenever I travel back to Idaho and plan climbs I use the following sites to research routes, I highly recommend all of them for you to use in planning your next Idaho adventure—Idaho Summits, Idaho Alpine Zone, Splattski, Idaho: A Climbing Guide, and SummitPost.
Until next time, cheers!

GPS Track
Date: October 15, 2018
Trailhead Elevation: 7,640 feet
Norton Peak: 10,332 feet
Total Elevation Gain: 2,605 feet
Class: 2
Distance: 7.4 miles
Moving Time: 3 hr 49 min
Stopped Time: 0 hr 26 min
Climbing Partner: Solo
GAIA GPS Link: Norton Peak (2018-10-15)