Sunday, December 28, 2014

Goliath Peak

Heading up Goliath
Originally Cole, Paul and I wanted to attempt a climb of Quandary Peak today.  With the snow conditions it didn’t seem like a good idea, so at the last minute we made plans to climb Goliath Peak.  Goliath is a mountain easily accessed in the summer months along Mount Evans Road.  Since the road is shut down for the winter, I thought it would make for a nice winter snowshoe. 
To access the TH drive I70W to Idaho Springs, find a way to HWY103.  The bridge is out so the detour makes you continue up I70 for a number of miles before turning around heading back down I70E to exit 240.  Once on Hwy 103 follow it for 13miles to the parking area just above Echo Lake.  There is a large road closure sign and that is where this trip began.  The forecast was calling for mostly sunny temps around 5°F with winds of 25mph+ creating wind chills of -26°F.
As we started gearing up at the TH I didn’t think the temp was all that bad.  The reason for this was there was no wind at all.  This was a nice teaser that would soon change for us.  The trail appeared to have about 4-5inches of fresh snow, and there were tracks from the previous day.  I started just wearing micro spikes then about 100yds up the trail put on my snowshoes.  I figured why carry them when I could just wear them.  The temps were cold as expected, soon I was growing icicles on my face, and my nose had frozen all together.
Beautiful Day
By the time we hit the first mile marker the sun was starting to peak through the trees.  We rounded the corner and had the long mile and half switchback ahead of us.  We decided to stay on the road as the trees were very thick and seemed to have a considerable amount of deadfall.  That would have made for a frustrating hike, but the road was very pleasant.  There was hardly any noticeable grade, so it felt like we were just out for a walk in the snow.  Cole and Paul were blazing ahead and I soon gave up even trying to keep up with them.  I was trying not to sweat, because that perspiration would just freeze making me colder.
At the end of the long switchback we were nearing tree-line and the sun was out in full force.  We sat there for a moment, shedding a few wet/frozen layers from sweat and taking a small fuel break.  At this point we had our first view of Goliath, and we could see the wind whipping off the summit ridge.  The sky was clear so we snapped a few pictures then headed down the road.  Nobody had been up this far lately, or the snow had just filled in the tracks so we had a small sense of solitude which was nice.
Summit Shot
We passed some sort of visitor center and stayed on the road as it made its way around a few short turns.  The wind was getting crazy so we all put our shells and goggles on before making the final turn.  Once we saw where the wind swept ridge connected near the road we headed cross country to meet up with it.  We planned to stash our snowshoes along the base of the ridge and boot it up the final 300 feet to the summit.
The wind was un-relenting; I would guess sustained 40mph+ and gusts of 60mph that created white-out conditions.  After caching our snowshoes we made quick work to get on the summit.  The winds calmed enough for us to take some pictures then we headed down to our gear cache.  It was a tricky, slippery descent to the gear but nothing as bad as James Peak about a week ago.  We made our way to the visitor center building to try and find some shelter from the wind to have a beer and some food.
Mount Evans Group
We had our slush-beers and found no real shelter.  We knew it was time to bug out, so we got on the move as fast as we could.  I had my hands exposed for about a minute and I damn near froze my fingers off.  I spent the next thirty minutes or so trying to get the blood flowing again.  Nothing hurts as bad as getting the blood flowing again…makes you want to scream.  We were all in the same boat, so I’m guessing the weather forecast was pretty accurate today.  The best idea was to keep moving so that’s what we did.  Never stopping for more than a few seconds, we were on a march out to the parking lot.
On the way out we passed a few people along the road.  The trail was in pretty good by now, so I could see that this is a heavily used area.  It was about 2pm when we made it back to the car.  The lot had about 6 or 7 other vehicles and the Echo Lake lot was full of 20+ vehicles.  For being so popular we had a nice day of solitude above tree line.  It was a cold wintery hike but we all learned a lot about keeping warm when the weather gets frigid.  It’s fun to hike in the winter, but proceed with caution and be prepared.
GPS Track


Date: 12/27/2014
Starting Elevation:  10,680ft 
Goliath Peak: 12,218ft
Total Gained Elevation: 1,540ft
Distance: 7.42 miles
Moving Time: 4:20
Stopped Time: 1:30
Partners: Cole and Paul

Picture Link: Goliath Peak Photo Album


Friday, December 26, 2014

Lichen Peak

Kristi and Nick on Lichen Peak
Over the last few years I have been taking Kristi on a short Christmas hike, so it is now becoming a tradition.  This year we didn’t really have anything planned, as we sat around in the living room on Christmas morning we didn’t seem to be making much progress on any either.  Around noon we decided on a hike and started getting ready to roll out of the house.  We decided to hike up Lichen Peak which is part of North Table Mountain to the NE of Golden.
Nick at the Summit
From our location in the south Denver metro area we drove C470 north into Golden which turns into HWY93.  Follow this past Golden and a mile or so down the road there is a large sign indicating the parking lot for the North Table Mountain Park.  As we arrived the snow was trying to start, but nothing really accumulating yet.  The area was supposed to get 1-3inches in the afternoon, so we wanted to get to the plateau of the mountain before a total white-out ensued.
From the parking lot the trail we took was more of a road.  It started as an asphalt road that was covered here and there with snow in ice.  After a few hundred yards it transitioned into a packed dirt/gravel road that was mostly covered by snow/ice.  We didn’t need any traction, but by now with all the snow that has fallen that probably isn’t a bad idea.  The first half mile or so is at a pretty good grade, it covers a little less than 500ft vertical placing you at the top of the mesa bowl.  There is a quarry to the east which is used for rock climbing, for our hike we went to the NW and found the Lichen Peak Trail.  From this trail split it is less than a quarter of mile to the small summit. 
The White-Out Approaches
The Lichen Peak Trail was pretty cool, where there was a lot of difference in rock type all of which reminded me of Craters of the Moon back home in Idaho.  Kristi seemed to be enjoying herself.  I got the camera out just before starting up the Lichen Peak Trail, so Kristi became our trip photographer.  The trail was pretty mellow, after a short incline I was on top of the small summit of Lichen Peak.  Kristi was taking pictures like crazy, so I went ahead and opened my summit beer.  A few minutes later Kristi made it to the top and we took our summit selfie.
The clouds were taking over by this point and it was becoming a full-fledged white-out.  Kristi was up for hiking to another hill to make the outing last a little longer so we headed over to the southern point which I believed in unnamed. The view from this point was none other than Coors Brewery.  After a short spell hanging out in the clouds we decided it was cold enough and we could head back to the car.  It was a fun day hiking with Kristi, and hopefully I can twist her wrist and convince her to do another hike or two with me before school starts back up.  I hope everyone had a great Christmas.
GPS Track


Date: 12/25/2014
Starting Elevation:  6,013ft 
Lichen Peak: 6,567ft
South Summit: 6,500ft
Total Gained Elevation: 600ft
Distance: 2.9 miles
Partners: Kristi

Picture Link: Lichen Peak Photo Album


Sunday, December 21, 2014

Dawson Butte Open Space Park

Dawson Butte
Kristi and I wanted to get out on a short hike since the weather was so nice, so we decided to head down to Dawson Butte Open Space.  I sent a invite to Cole and Jenny and they were soon ready to go on short notice.
Nick and the Butte
Dawson Butte is an Open Space Park in Douglas County.  The Douglas County Webpage can be found here: DBOS. There are several ways of getting to the park; here is the way we took - drive south of Castle Rock on I25 take exit 174 which is Tomah Road.  Take the hairpin turn from the exit onto Frontage Rd, about a mile and a half north is Tomah Road that turns to the west crossing the rail road tracks.  Follow Tomah Rd for a few miles till you see the Dawson Butte Park sign on the right hand side of the road.  There is a large lot to park in.
The main trail is a 5 mile loop that can be taken in either direction.  There is minimal loss/gain of elevation only mounting to around 200ft or so, which makes this a nice hike at any time of the year.  The trail seemed to be used by more horses and mountain bikes than hikers, so keep your eyes out for oncoming traffic and road apples.
The Rewards
Most of the trail is single-track with a few sections that follow older roads.  The only downfalls of this hike were there was no summit..haha, and a lot of the hike follows alongside a road so there isn’t the feeling of getting away into the outdoors.  But, for a nice stroll this was a good hike.  If I were into trail running or mountain biking I would use this frequently, but for hiking I think there are more challenging and scenic trails towards the foothills of the Front Range.
GPS Track
We all had a great time, and were happy that the trail wasn’t crowded like some in the JeffCo area.  And I always love the rewards of a good hike with grabbing a pint at the local brewery with some good friends.  Cheers Everyone!


Date: 12/20/2014
TH Elevation:  6,820 feet
Total Gained Elevation: 225 feet
Class: 1
Distance:  4.56 miles
Time:  1:47 moving, 40 stopped
Hiking Partners: Kristi, Cole and Jenny

Picture Link:Dawson Butte Pictures

Thursday, December 18, 2014

James Peak

James Peak
Fall term finished up last week so it was time to get up into the mountains.  Cole and I were able to plan a mid-week climb of James Peak.  This is a mountain that I have wanted to climb for well over a year now, so I just said what the hell; let’s do it.  I picked Cole up around 6am and we made our way to the St. Mary’s Glacier TH.
There are many ways to approach a climb of James Peak.  In the winter time the easiest route I would think is the St. Mary’s Glacier route in which we took.  There are also options from Berthoud Pass, which would be wild crazy roller coaster ride, but some adventurous souls do meet that challenge.  Not I though, I have been in the wood shed so to say with school, so I had no problem taking the “milk run,” which turned out no cup of tea.

Tanglewoods Near St. Mary's Lake
The forecast didn’t look very pleasant.  I usually use NOAA since it seems the most accurate, but today I don’t know that any weather forecast was too accurate.  NOAA forecasted cloudy skies and to expect temps around -11°F with winds 15-20mph and gusts of up to 30mph, along with afternoon snow of up to 2 inches possible.  We found the weather much more pleasant than that for the most part.  The sky was clear and sunny for the first few hours of the climb then the clouds started moving in from the south west.  A breeze here and there but I wouldn’t say they were above 10 mph.  We both though the temps were around the 25°F area as neither of us had to use down jackets to warm up during the trip.  I guess my point is, never fully trust the forecast.  It is always safe to bring more than you need because you can always keep extra layers in your bag, but if you don’t bring enough for unforeseen conditions…well you may be just up shit creek.  I feel the two of us are pretty seasoned and we brought plenty of gear for whatever Mother Nature felt she wanted to throw at us.  They did forecast the snow correct…and it was a bit of a pain in the ass come the end of the day.

Cole and Me Ready to Roll
Directions: For starting at St. Mary’s Glacier TH.  From Denver head towards the mountains on I70W.  Not far past Idaho Springs take exit 238 which is Fall River Road.  Follow this road for about 10miles.  You will pass what appeared to be an old ski area where there is a big lot, continue up the road.  Look to the left and a large sign indicating Glacier TH will be visible.  Another 50 yards down the road is a small lot that requires a deposit of $5.  This is where the fun begins.
From the TH follow the trail or road as it looked up towards the first small lake which is St. Mary’s Lake.  From the car I would say this is only about a quarter of a mile or just a bit more.  Once at the lake St. Mary’s Glacier comes into view to the North West.  We followed the trail around the lake till we found a good area to cross over to the glacier.  There was a decent amount of snow at the base, but once on the glacier we could feel the crunch of the ice with our micro spikes on.  Most people like to practice their ice axe skills and glacier safety once on the glacier, Cole decided to practice once by just falling to the ice and sticking in his axe.  I sat there and laughed and said I think you will survive.  Follow the glacier to its terminus maybe a quarter mile and as it splits into a few fingers we took the left exit, but they both end up at pretty much the same place.

St. Mary's Glacier
Now that the glacier is behind us there is quite a tundra hike ahead.  We decided not to follow the trail..like we would be able to find it anyway, and just headed cross country on our way to a large rock out-crop in the middle of the flat tundra.  We took a little breather here and I thought about stashing my snow shoes as I didn’t think they would be necessary.  But, I convinced myself that I didn’t want to cache anything today since I didn’t know if we would descend the same route as our ascent.  We sat there and pondered at what route to take, I wanted to stay to the ridge to hopefully avoid any large snowfields.  When you are ‘hefty’ like me the snow needs to be rock hard for snowshoes to be worth a dam.  As we headed over Cole was taking the route more as the trail would follow, and I was on a line heading to the ridge direct.  It seemed like an eternity walking across the tundra, some areas were covered with snow drifts that I would post hole to my knee in and some snow was ice hard.  By the time I reached the base of the ridge Cole was way to the south of me and I had lost visual of him.  I decided to put on my snow shoes and my wind parka since I would be on the ridge.  I started up and the snow was pretty firm and I was able to stay on top.  I was cruising up the slope about as fast as a ‘hefty’ guy can at 12k feet.  I thought I heard some yelling but didn’t think much of it.  I figured Cole was staying to the south on a line away from the ridge, so I didn’t expect him right above me.  He must have run up the mountain, because he covered a decent amount of ground in a short period.  Once I popped up over some rocks he saw me and waited for me to catch up.
I estimated we had about 800 vertical feet yet to cover to get to the summit from where we re-grouped.  At this point I was pretty exhausted, but I wasn’t worried too much about the weather so I just took my time heading up.  We stuck together for the remaining roller coaster of a ridge.  There was a lot of huffing and puffing to be had for the next hour.  I could really feel my lack of mountain activity over the last four months catching up with me.  No amount of work in a gym can really get you in mountain climbing shape, you just have to get out there and suffer and somehow convince yourself you are having fun and make yourself do it again.

Summit At Last
This last section was pretty painful…for the both of us.  I would have kicked Cole’s ass if he didn’t admit he was hurting like I was.  At one point I told Cole there was no recovery at this elevation.  It felt like a jackhammer in my chest that never wanted to turn off. We just pushed on after every breather and kept making ground up the mountain.  The snow started to come down intermittently over the last few hundred feet as the white out tried to surround us.  With conditions like these it is really important to have experience, fellow climbing partners and knowledge of existing landmarks..and a compass or GPS. 
The last 50 vertical feet I thought was the hardest at that point.  It took quite a bit of time and energy to get up that last incline, but once we did we were finally on top of James Peak.  Both of us were pretty drained from the climb, but now we were finally able to recover.  There were no sights to see today, just mountains of clouds all around us.  The sun did peak through once or twice…I’m assuming that was the Mountain Gods congratulating us on our ascent.
We didn’t hang around too long on the summit since I wanted to at least get down to the flat tundra before the real snow started coming down.  Earlier I said I thought the last incline was the toughest part of the climb…well now I am calling my personal crux the entire descent to St. Mary’s Lake.  There wasn’t enough snow or slope for a glissade and whenever we crossed any snow it was post hole hell.  It took a long time for us to get off the ridge and back to the rock outcropping in the middle of the flat tundra.  I have no idea how our legs got us through all of that, but I can now see the days of doing squats and leg presses at the gym paying off.  By this time the snow was really falling and the light was pretty dark which kissed our depth perception good-bye.  As we started walking down the glacier we looked more like a couple drunken guys walking away from a St. Patty’s day party than anything.  Once we could finally see the lake I got a little burst of energy. 

How to Open a Brew with an Ice Axe
When we were on the summit I didn’t feel it was a good Idea for us to have our summit beers in our condition.  We were both loopy enough as it was, so we ended up deciding on having them by the lake.  Now that our goal was in sight, we just had to drop down the glacier and find a spot to enjoy some ice cold brews.  It was a great moment, the snow was coming down, the view was great and the ice axe bottle opener came through for us when we needed it most.  We knew it wasn’t far to the parking lot so we took this time to relax. 
This was a brutally challenging day for the both of us, but we never let it get to us..too much.  Though it is not technically winter, we have both agreed we are counting it as a winter climb.  An added bonus to the day was the solitude we had with a mid-week climb; we didn’t cross another person all day on the mountain.  It was almost 5pm by the time we were back to the truck, so that means we were out there for almost 10 hours.  This would be an easy climb in the summer, but this was a great challenge that the both of us can use to build on and say…well at least this is better than that trip up James Peak.  Hahaha, it’s always good even if it sometimes sounds bad, and I’ll always go back.  Happy Holidays everyone!
GPS Track
Date: 12/17/2014
TH Elevation:  10,387 feet
James peak: 13,294 feet
Total Gained Elevation: 2,910 feet
Class: 2
Distance:  7.43 miles
Time:  5:37 moving, 3:54 stopped
Climbing Partner: Cole

Picture Link: James Peak Photos

Sunday, October 12, 2014

Mount Flora

Cole and Me on the Ascent
I made a last minute decision around 8pm on Friday that I needed to get out on a mountain on Saturday.  I shot Cole a message and he was in for whatever.  I knew I had lost a step in my climbing game with my office job, so I decided to keep it pretty simple and head up Mount Flora again.  The ultimate goal was to tack on either Eva or Breckenridge, but a single mountain was enough for me on this day.
Mount Flora
The TH is Berthound Pass, and you can either follow the CDT or head up CO Mines Peak via the access road then follow the ridgeline to Flora.  I prefer the CDT route, because all the man-made structures at the top of CO Mines are rather unpleasing to me as that is what I am trying to get away from when I’m in the mountains. 
The temp was a chilly 35°; we put on some layers and started up the trail around 8:30a.  The access road was lightly covered in snow, but once moving onto the trail it was ankle to shin deep.  This was a good day to have gaiters.  This was my third time on the mountain and each time a new element has been thrown in my face.  The snow and blustery winds made a nice challenge out of a normal easy hike.  One set of tracks were on the trail ahead of us, which appeared to be trail runners, so I image that guy had some cold toes.  We met up with a guy on his way down just before reaching the saddle between CO Mines and Flora.  He said it was a white-out up there and he was shooting for Eva, but settled with what he though was Flora.  I confirmed he was on Flora based on the tall slender cairn that marks the summit.  We came geared up for bad weather so we didn’t think too much of what he said and pushed on.  This was one of those days where it was a complete white-out with 40mph winds one minute and clear and sunny the next.  So, it was a great taste of October in Colorado.
Pano Looking to the East
I could tell I was way out of my typical climbing shape.  The last time I was at any decent elevation was on Mount Guyot which seems like an eon ago.  That desk job at USGS isn’t helping my cause at the moment either.  Oh well, just soldier on one foot in front of the other as usual.  At least with the adverse weather I could blame my sluggish nature on the high winds..haha.
Cole Marching Up to the Summit
Another couple turned around near the false summit, and they appeared to be wearing a bare foot type shoe.  I’m not sure what they were thinking, so good thing they headed back down.  My boots were covered in snow the entire trek, and I had cold toes, so wearing a light shoe makes no sense in these types of conditions.  The weather didn’t seem too bad, I’ve had worse.  I never forget my climb of Mount St. Helens with howling winds and sleeting rain…now that sucked!
We were able to follow the large cairns to the summit, they were half covered in snow in some places but easy to spot because of their height.  We attempted to use a wind shelter that I had used previously near the summit but it was full of snow already.  A short hike from there we found a large boulder to hide behind.  I pulled out my large puffy and down mittens and we cracked open our summit beers.  Maybe one of the coldest beers I’ve ever had.  That along with my PB&J and I was a happy camper.
Grays and Torreys
The weather was constantly changing while we were on the summit.  We stayed up there for quite a while.  It was freezing cold, but we prepared for it.  Just putting my back on and adjusting straps froze my fingers into stiff fingersicles.  The down mittens paid off and warmed up my fingers pretty fast.  We decided it was time to head down and started off while we could still pick out the route being there was no cloud cover for the time being.
On the way down I put my trekking poles away so I could work on warming up my fingers.  Cole got a nice comedy show of me eating it a few times in the slick snow.  I’m sure he did too, he just didn’t have anyone to laugh at him..haha.  We made good time coming down and the temps seemed to rise quickly.  I was shedding layers about every mile, by the last mile we had no hats or gloves on and that is always a good sign that the winds and freeze has died down.  It was a great hike, the elements kept most of the yuppies at home, so we basically had the mountain to ourselves.  I’d love to get out more often and will have to make an effort to stay in shape so these days aren’t so daunting.  But I’ll still do it either way, because it’s my “Happy Place.” Cheers and enjoy the changing seasons.
GPS Track
Date: 10/11/2014
TH Elevation:  11,307 feet
Mount Flora: 13,146 feet
Total Gained Elevation: 1,875 feet
Class: 2
Distance:  6.38 miles
Time:  3:35 moving, 1:40 stopped
Climbing Partner: Cole

Picture Link: Mount Flora Photo Album

Sunday, August 17, 2014

Mount Guyot

Mount Guyot
With school starting on Monday, I needed to get in one last mountain for the summer.  My climbing buddy Paul was finally back in Denver so we made plans for a climb of Mount Guyot.  Mount Guyot was my primary objective for climbing this summer; nothing like waiting till the last minute.  July of last year I did a climb of Mount Silverheels which lies to the SW and that day I put Bald Mountain and Mount Guyot high on my list of peaks to climb.
Directions are pretty straight forward, drive to Breckenridge and turn east on Wellington.  This comes up pretty quick when approaching from the north.  Follow the road through the residential area till it turns to dirt.  At the end of the road is a parking area and this acts as the TH for this climb.
Bald Mountain Pano
We arrived at the TH around 8:30a.m., which is really sleeping in for us.  It didn’t bother me too much as long as the weather didn’t become a factor later in the day.  There were four or five cars in the lot already, but we didn’t really see anyone for quite awhile.  The first section of trail heads down a road for 1.25 miles before actually getting on anything that would resemble a real trail.
I had been down this road previously with a failed winter attempt back in December, so I had had an idea of the route already.  I did my research for this climb on 13ers.com.  Just after passing a large property around the 1.25 mile mark there is a trail or what appears to be an old jeep road heading off to the left.  Make your way down the trail and about 50 yards or so you will see there is a sign.  I’m not sure why that isn’t right on the road, probably has to do with being on private property rather than NFS land.
Summit Ridge
Hiking up the trail is a nice change of pace; it goes from single to double track a few times.  There are a few tiny creeks that roll by that are nice for cooling down later in the day.  About a mile up this road is a cabin off to the left; from there the route really starts to gain.  The trail will finally open up outside of the forest and you will start to see what you have to do.
The first objective from here is to climb directly to the ridge.  I’ll warn you, this is no picnic.  A 600 foot gain in a short distance makes for a very steep slope.  This is where I had to turn back in December because the snow was so bad.  Make the trudge up to the ridge in whatever fashion you like.  Once on the ridge the grade mellows out and your claves can start to recover.  We took a fuel break here, probably about 1.5hours into the climb.
Summit with Bald Mountain in the Backdrop
A faint trail goes in and out along the ridge.  There is another steep climb of about 600 feet coming up, but we were lucky to find that the goats had made us some nice trail through the talus.  It didn’t seem like it took us too terribly long and we were at 12,500ft.  The only thing that lay in front of us was the 800 foot grunt up the boulder field.  At this point we had some fluffy clouds surrounding the mountain so we had to keep our eyes on how they developed.  I think our karma paid off, and the mountain gods let us continue our journey up Guyot.
The grunt up the boulder field is as stated..a grunt.  I would rate the boulders semi-consolidated, at times boulders that should be way too big to move would move on you.  Proceed with caution, because this is the last place you would want an ankle injury or something worse to happen. We took our time, but consistently made progress up the mountain.  Once gaining the west side of the ridge I think we both had big smiles on our faces.  The last ridge walk took a matter of five minutes then we were on the summit of Guyot.
I had run out of fuel on the last push, so I had to eat a cliff bar.  I’ll be honest, it didn’t taste good, but it was needed.  After a few minute recovery period we took some pictures and were on our way down.  We didn’t want to have summit beers on top of the boulder field; lingering on top with shady weather was not a good idea.  The beers were waiting for us at the 12,500 foot hump.
Paul and Nick on the Summit of Guyot
It was a long trudge down the boulders, but it felt as if we made good time.  As we arrived at the 12,500 foot hump I saw a mountain goat on the far ridge.  This looked like a good spot for a Pb&J and an ice cold beer.  We had a good lunch, hoping the goat would get a little closer, but he was happy eating grass on the other side of the mountain.  The clouds were building up again so we gathered ourselves and started down the ridge of the mountain.
Both of us were hurting a little bit, but nothing too bad.  We found a few short cuts on the descent through the trees that hosted some soft ground for my sore fee.  Once back on the trail it was a short hike out.  This was an excellent trip with a good climbing buddy.  I’m glad I was able to sneak it in before the semester got underway.  I hope to get out a few times this fall, but we will just have to see how it goes.  Cheers!
GPS Track


Date: 8/16/2014
TH Elevation:  10,290 feet
Mount Guyot: 13,370 feet
Total Gained Elevation: 3,100 feet
Class: 2
Distance:  7.49 miles
Time:  4:34 moving, 2:00 minutes stopped
Climbing Partner: Paul

Picture Link: Mount Guyot


Monday, August 4, 2014

Horseshoe Mountain and Peerless Mountain

Horseshoe Mountain
With school ramping up in a couple of weeks I wanted to get out on a last camping trip for the summer.  I have long wanted to hike Horseshoe Mountain.  This mountain has an easy class 1 trail that is within a couple hours of Denver.  Craig found us a nice camp site at the Four Mile CG which is just down the road from the Horseshoe TH.  We met up with Craig around 7am, set up our tent and were on our way to the TH.
The TH for this hike can have many different meanings.  It all depends on how far you are willing to drive your vehicle.  We saw a few vehicles that drove to the saddle separating Horseshoe and Peerless Mountains (13,200ft), but that kind of defeats the purpose of what we are all doing out here.  I chose to start at the 4WD TH described on the 13ers.com description. 
Basic directions are to head to Fairplay along HWY 285.  Drive south through town making a turn right onto CR18.  There is a sign directing you towards Four Mile Creek Rd.  Follow this for 8 miles to Four Mile CG.  About two miles up the road from the CG is the Leavick site.  There is plenty of parking just past the old mining structure for low clearance vehicles.  Those with capable vehicles can drive an additional .75 miles up the road turning left onto a more rocky road.  Drive about .5 mile up this road to the TH used in this trip report.  As I mentioned 4WD vehicles can make it much further up the road and there are plenty of spots to park, it just depends on how much hiking you want to do.
Nick and Craig on the Ridge
We arrived at the TH around 8am and were soon started hiking up the road.  The road is easy walking and soon I found out that we could have driven up further than we did.  That was o.k. with me because I was up for a good hike today.  A mixture of old mining roads weave all around the side of the mountain, so basically just pick the road that has the right grade for you.  This could have been done in a more direct fashion as well, but I think our group was happy with adding some extra miles to ease the hike up.
Alongside the road there are remnants of past mining.  Some of it was interesting, but most of it looked like trash that wasn’t too incredibly old.   Checking out the old equipment does help take your mind off the exhaustion though.  The switchbacks weren’t that bad; about an hour and a half from the start of our adventure put us on the saddle between Horseshoe and Peerless Mountains.
By the time we got to the saddle the mostly blue sky was starting to cloud up a bit.  We decided to head over to Horseshoe first then do the short hike up Peerless on our way back down.  There is a faint trail that leads to the main ridge of Horseshoe that can easily be followed.  After getting off the main saddle area the trail will start gaining again, but nothing to steep.  There is just over 600ft of elevation to gain from the saddle to the summit.
Craig, Kristi and Nick on the summit of Horseshoe
Some puffy clouds were getting close to the mountain but they kept heading to the south, so the weather was working for us.  I had to keep a close eye on them tough because they were pretty close at times.    
About two and a half hours into our hike we made it to the summit of Horseshoe Mountain.  The view down to the Leavick Tarn was quite impressive.  I could only imagine the crowds of people over on Sherman today, so I felt pretty lucky that just the three of us were on this summit.
We had a quick snack and took the usual pictures before heading down.  I wanted to get down before any rain or thunder storms came along to ruin our fun day.  I was feeling pretty good on the way down so I tried to sling-shot my way up Peerless as quick as I could.  From the saddle area it doesn’t take more than 10 minutes to summit.  The view of Sheridan is very enticing from Peerless.  I have already climbed that mountain so I said hello and goodbye as I headed back down to the saddle where Kristi was.
Nick and Craig Ascending Peerless Mountain
At the saddle Kristi had found a couple of our friends that climbed the wrong mountain today.  We caught up with them for a few minutes then started making our way down.  I was more in the mood for the direct line down the mountain rather than the road, but not everyone else was in agreement with that.  I decided I would head down and grab the Jeep so I could drive up to pick the rest of our group up.  It was a fun run/skip/trying not to eat it adventure cross country to the TH.  It didn’t seem like too much time went by and I had made it back to the Jeep.  A quick 5 minute drive and I met them on the road.

I think we all had a great time on the mountain today.  Kristi got her first 13er in and I think this was Craig’s first mountain of the year.  I would recommend this for any beginner wanting to get out on an easy peak.  I would rate this hike exactly like the neighboring 14er Mount Sherman.  So if you can do one, you should have no problem doing the other.  Someday I’d like to come back and do a Tour de Sherman starting with Sheep Mountain looping all the way to Sherman.  But that is a long ways off, since I don’t have the endurance for a hike like that right now.  Now it’s time to relax a bit before classes start in a few weeks.  Cheers!
GPS Track
Date: 8/2/2014
TH Elevation:  11,840 feet
Horseshoe Mountain: 13,894 feet
Peerless Mountain: 13,337 feet
Total Gained Elevation: 2,200 feet
Class: 1
Distance:  6.67 miles
Time:  3:43 moving, 1:47 stopped
Climbing Partner: Kristi, Craig

Monday, July 28, 2014

Idaho: Handwerk Peak and Goat Mountain

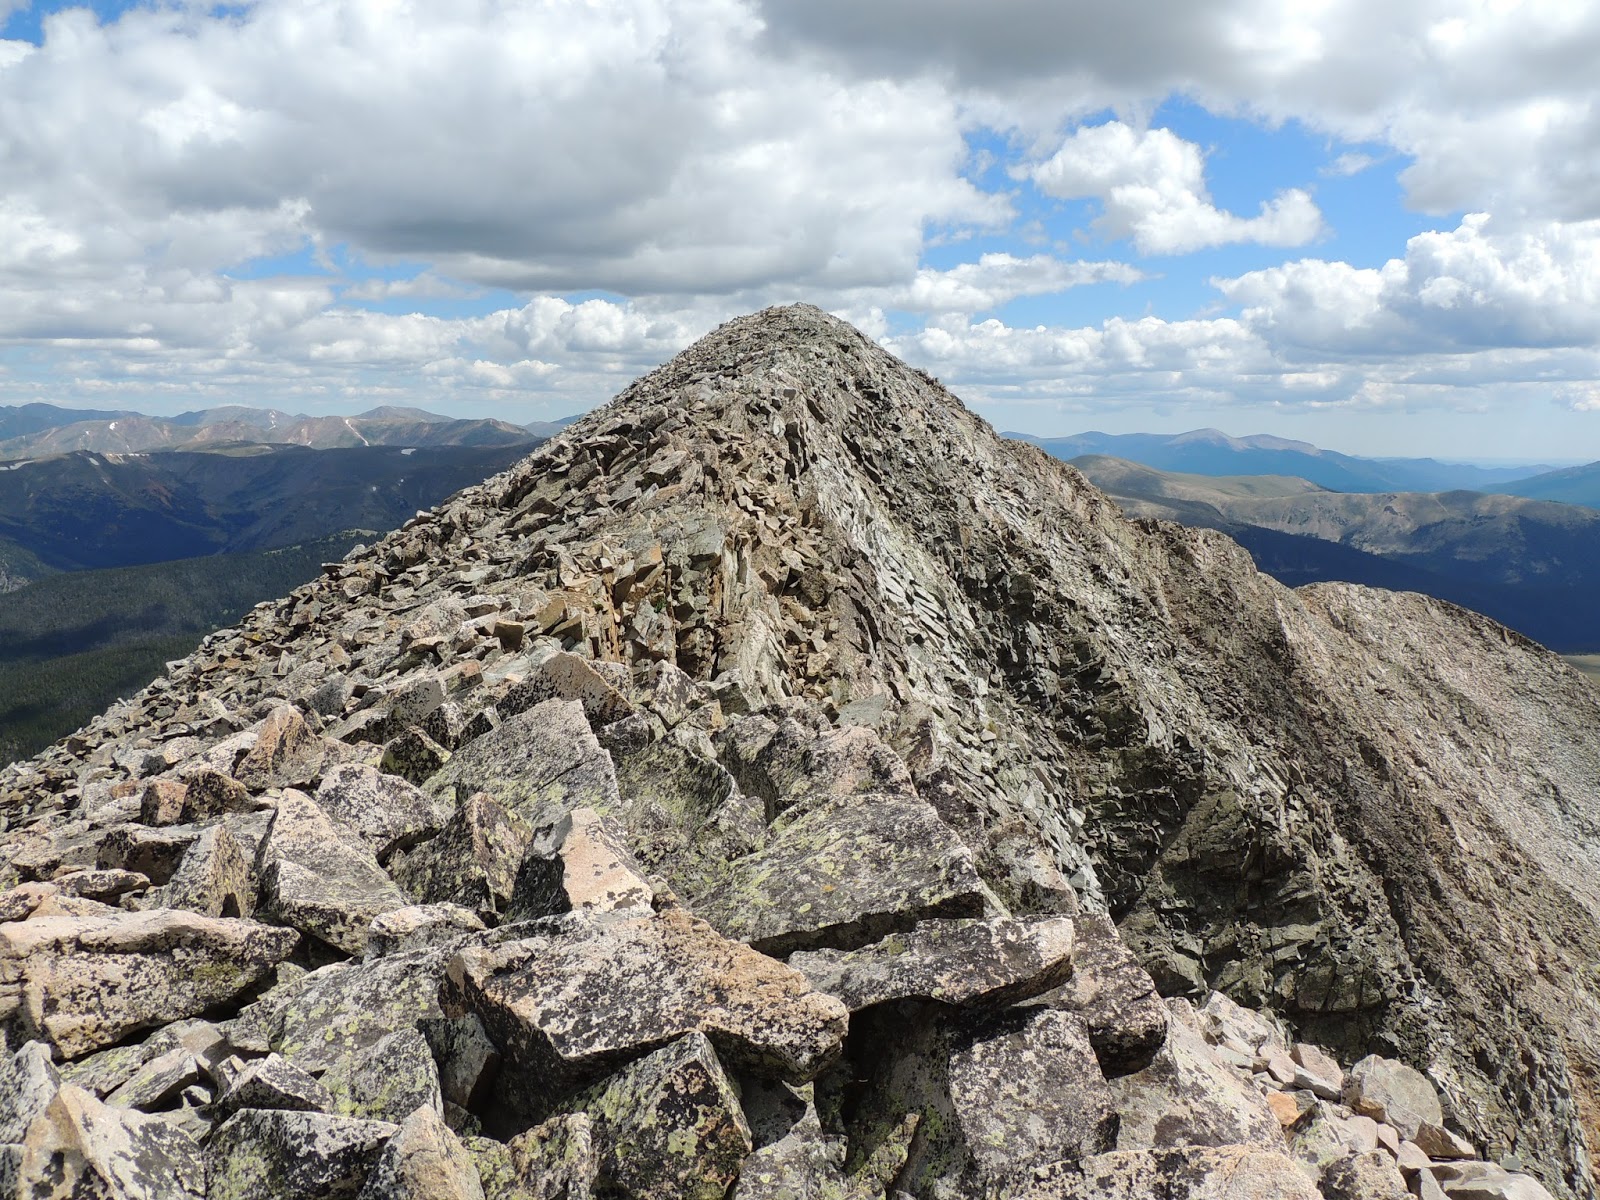
Summit of Handwerk Peak
Mike and I have tried to make plans to climb Goat Mountain in Idaho for the past few years with nothing ever materializing.  This year we decided to get serious.  Usually one week each summer I find my way back to Idaho to get out on some peaks with my old climbing buddies.  This week I was lucky enough to have my Dad, Mark come over from Oregon and my two friends Mike and Loren from Idaho meet up with me for a few nights.  With a climb of Goat Mountain being over 5,000ft gain and 14 miles round trip it is quite a commitment. I thought that sounded like a lot of work for a guy like me to do in a day so we decided to backpack in about four miles and set up a base camp.
This trip starts at the North Fork Hyndman Creek TH.  Many Idahoans are familiar with this area since this TH is next to the Hyndman TH.  Don’t be mistaken and take the wrong trail, the North Fork Trail is at the end of the dirt road. 
Our plan was to pack into a camping area about four miles in, set up camp and hike Handwerk Peak on the first day.  The next day would be the climb of Goat Mountain (primary objective), then the last day was to hike out or try climbing the Spitzl if there was any juice left.  Me, Mike and my Dad headed in mid-morning on Wednesday.  Loren would be joining us later that evening since he had work obligations. 
Handwerk Peak
From what I can gather the North Fork Hyndman Creek Trail is primarily used for accessing Pioneer Cabin.  This was an old ski cabin built years ago that many locals hike to for a day trip.  I have been up there two other times previously, so this was not on the agenda this time.  Just a note, if you do plan to go up there an early spring hike is fun from either the Corral Creek side or the Hyndman Creek side. 
Day 1 – Handwerk Peak
The trail is well maintained and the Ketchum Ranger District is pretty good about keeping the trail conditions up to date on their website.  The first 2.8 miles is pretty mild.  The gain is not too bad, probably around 1,000ft so with a full pack on it wasn’t too bad.  There is a trail split here where switchbacks soon start for the trail to Pioneer Cabin or a trail to the east that heads out into the open meadow towards Handwerk.  The trail fades out since not too many people use it, and that is kind of what this group likes.  We needed to find a camp site that was flat, had water and Loren could find.  There are some nice rock slabs that raise a few hundred feet and are still visible from the trail split; this is the area we chose to camp.  Originally we wanted to camp in the basin below Goat, but I thought that would have been much more difficult for Loren to find late in the evening. 
Mark, Mike and Nick on Handwerk
My pack was overly heavy for two nights; Mike and I guessed it was around 50 pounds.  That beer was weighing me down, but it would be a blessing over the next two evenings.  I was happy we found a place without too much hard work.  We set up our camp and put a flag out for Loren to see in case we were still up on Handwerk when he arrived.
Our camp site wasn’t too far from the base of Handwerk peak.  There were a few small creek crossings, but we just followed the tree line around the east so there was no bushwhacking at all.  For those of you that haven’t climbed this mountain you are in for a real treat.  I would say this is the most unique mountain in the Pioneer Range.  It’s not often you find a sand dune with a few rocks here and there deep in the Idaho Mountains.  Be ready for hiking on loose sand for a long, long time.  From camp the summit rose about 2,000ft in about 1.25miles.  This took us an incredible amount of time because of the sand.  I spent some time checking out the geology of the mountain as well.  There was some magnetite and malachite that kept catching my eye as I was hiking.  As we reached the false summit the wind picked up but thankfully the sand ended.  The top of the mountain seemed to mainly be a slate rock which is interesting in itself. 
Some Old Friends
I would guess the wind was blowing in the upper 30’s (mph), with a couple gusts that knocked over the smaller guys.  Lucky for me I have a solid base and I just walked up the ridge.  I’m used to the awful Colorado winds on the high peaks I guess.  Maybe a half hour later we were all on the summit.  I was dragging ass, probably from the backpack in.  Either way I was glad to finally be on top.  The views were pretty clear and we had the summit to ourselves…man I love Idaho!
We did a little route recon for Goat and I was shocked at how far back it looked.  It wasn’t that bad, I think the hike had just kicked my butt a little extra today.  I want to say it was around 5pm when we were on the summit so we decided to start heading down since we thought Loren would get there around 7pm or so.  The beautiful thing on all our minds besides the beer in the creek was that soft sand we would be skiing down virtually back to camp.  It was a dusty, but sweet descent.  In no time at all we were back at camp enjoying some nicely chilled Idaho craft beers by the creek.
After a nice cool down by the creek we made our way out to a point on the rock where we would be able to see Loren on approach.  We sat out there probably about an hour till I saw a light flash by the far tree line.  We flashed him back and it seemed like he was up to camp in no time at all.  As I expected he greeted us with more beer, I guess he knows this crew pretty well…hahaha.  We all hung out for a while and enjoyed the stars.  I love coming to Idaho where you can see the Milky Way.  That is hard to find in the light polluted Denver area.
Entering Goat  Mountain Basin
Day 2 – Goat Mountain
It was nice sleeping in for a second day after the drive from Colorado.  We were in no hurry to get out since the weather was supposed to be near perfect and we were half way up the mountain.  Somewhere around 9am we started making our way into the basin below Goat Mountain.
Idaho is called the Gem State, and I think this was one of those gems.  This area is an amazing glacially carved valley.  If you head this way plan to camp in the upper valley, you just have to make it up about 800 more feet of elevation from where our camp was.  The valley opened wide and it was like something from the Sound of Music, a wild array of flowers, waterfalls and lush green grass that seemed to go on forever. 
After making our way to the end of the valley we finally reached some rock.  It is easy to spot a route around a very large rock face and a ramp leading to the first summit of Goat.  We followed the grass and slab rock as far up as we could till jumping into the boulder field.  These boulders are very large and were great for climbing on.  The vertical gain comes quick, but so did my heart rate.  Needless to say I took my time.  After gaining a few hundred feet through the large boulders it is a walk up the ramp to the first summit.  What I mean is there is no more scrambling up the boulders, the boulders gets smaller so in a sense it’s a walk up from here.  As you do this climb don’t forget to look behind you every now and then, the view is stunning.  Old Hyndman keeps rising through a notch in to the east of Duncan’s Ridge. 
View Towards Johnstone
Our group got together near the first summit as the real scrambling was about to start.  I haven’t been on a good class 3 route in more than a year, so I was excited to get going.  Loren was reading Splattski's report…I think.  He told me what side to go around and I was off.  I just found my own way from there as all climbing adventures should be.  I thought this was very tame and not too difficult at all.  There wasn’t much exposure that I ever saw.  The climb down to the mini saddle between summits was the only hard part.  Climbing up to the top of the main summit was quick and direct.  Now, if the rock was wet or there was ice and snow this would be a different story.  Still doable, but it would be a little nerve racking in a few spots.
The summit was unreal, definitely on my top 5 list.  The surrounding views of the mountains were one of the better views I have ever had.  It made me really appreciate Idaho, because if I was home in Colorado there would be at least 50 other yahoos up there with me.  It was nice to share the summit with my Dad and some good friends. 
The Boulder Field
I seemed to forget I was starving in the excitement of the scramble, so I had to eat some food before the climb back.  I would suggest some leather gloves on this one.  I sliced my hands a few times on the rocks, but scars are cool too.  It was just after 1:30pm and we were heading back down the mountain.  The weather couldn’t have been much better for this climb.  Jackets came off for the trip back down and the wind died down and heat increased with every step.
East Side of Goat Mountain
We took a more direct line down into the valley.  The boulders were steep, but we weren’t in them as long by taking the more direct line.  Once down on the grass we took a long break and enjoyed the view looking towards Johnstone Peak and the Sun Valley Ski Area.  Loren said he could stay there all day, and I would have to agree with him.  I polished off the last of my water, so we made our way down to the creek in the valley to replenish our supplies.  The valley seemed to keep going on going, but that was a good thing for once.  I enjoyed the breaks along the creek and for once being able to take as much time as we wanted.  No thunderheads like back home, so I figured I better enjoy it.
Beautiful Day
After the last break I could feel my ankles and feet tightening up so I did one solid push back to camp.  There were lots of game trails we could utilize here and there which made the hiking a bit quicker.  Once back to camp I grabbed my camp towel and headed to the creek. 
The cool mountain water was very refreshing on my feet.  The beer was even more so.  I was looking at my toes and they weren’t looking too good.  My big toe nail ended up popping off from an injury I had in Utah a few months prior.  A little duct tape and I was good to go.  We all sat around the creek soaking and getting cleaned up a bit.  Next thing we knew the sun was behind the mountain and it was getting dark.
Day 3 – Hike Out
I was pretty beat after the past two days in the mountains so I knew I would be heading out in the morning.  Dad had to get back to La Grande to work an evening shift at the hospital, so we planned on a 7am departure.  Mike joined us on the hike out but Loren stayed another day in the valley and climbed the Spitzl by himself.  I heard he got a nice summit nap in…lucky, I wish my body could have lasted another day.  Dad and I got back into Hailey by 10am and found some biscuits and gravy at Shorty’s.  Not as good as the Pickles breakfast from a few years ago, but it was damn good.

It’s always great to get back to Idaho and do some climbing where it all started for me.  Nothing beats Idaho, Colorado is nice and all but the solitude that you can find in Idaho is unmatched.  I’m not sure when I will be back there for another adventure, but there were talks of Longs Peak next summer…so stay tuned.
Full Trip GPS Track
Handwerk and Goat Route


Date: 7/23/2014 to 7/25/2014
TH Elevation:  7,085 feet
Handwerk Peak: 10,860 feet
Goat Mountain:  11,913 feet
Total Gained Elevation: 7,330 feet
Class: 3
Distance:  17.4 miles
Climbing Partner: Mark (Dad), Mike, Loren
Picture Link:  Handwerk and Goat